The majority of drivers are aware that using jumper cables to connect a dead automobile battery to the battery of another vehicle will revive it.
Knowing how to use a set of traditional jumper cables is useful if your car battery dies. Even though connecting a set of jumper cables might appear simple, a lot of things can always go wrong.
The jumper cables melting or smoking is a problem you don’t want to deal with.
What are the reasons why your jumper cables melted?
Here are the most common and possible reasons why your jumper cables melted:
#1. Wrong connection.
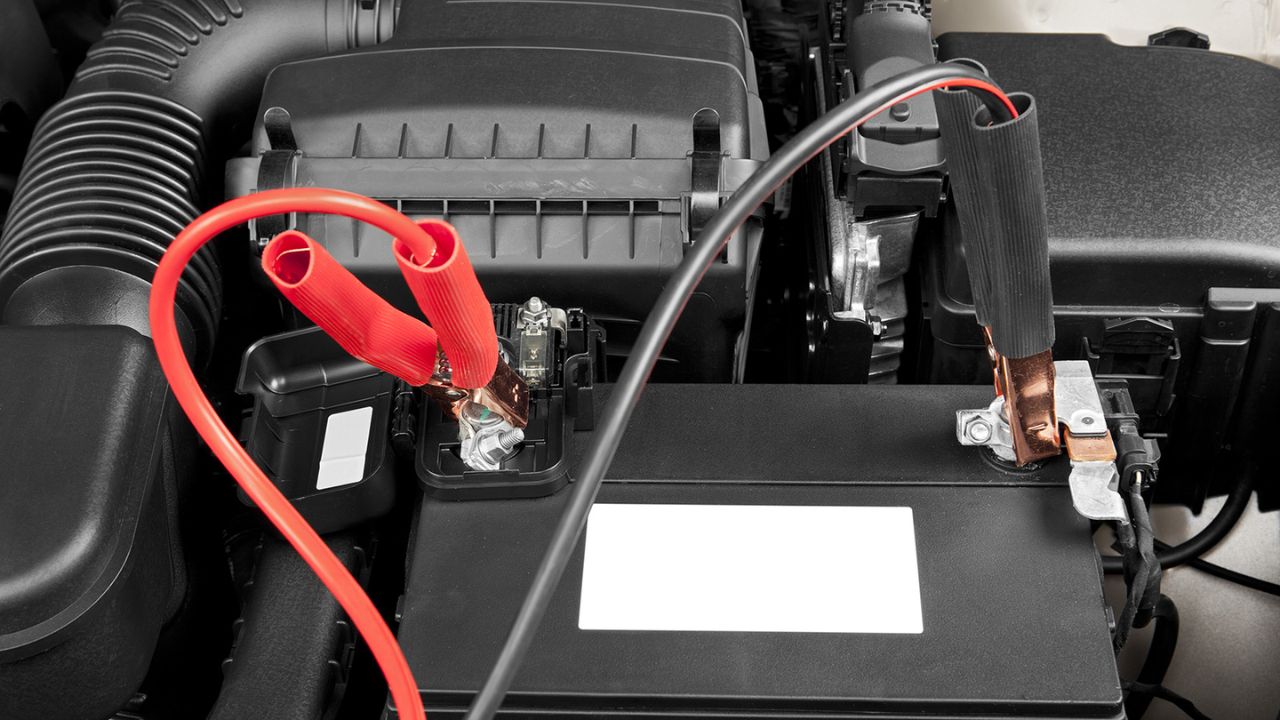
A misaligned connection is the most typical cause of melted jumper cables. Make sure the cable clamps are connected to the appropriate terminals on the battery when using jumper cables to connect one automotive battery to another.
The black wire should clamp to the negative post whereas the red cable should typically attach to the positive post. Reversing this will result in electrical failure and melt the cables.
The safety features in modern vehicles prevent batteries from exploding, which would melt the jumper cables. It’s important not to rely solely on color to prevent this from happening. Find the “Plus” and “Minus” symbols, then pair them up appropriately.
You should have a rather quick charge if you are using a good set of jumper wires. Nevertheless, if you’re using substandard wires, there may be other problems as well as a much longer charge time for your battery. This leads us to the following typical explanation.
#2. Improper Material.
The material of the jumper cables is another frequent issue faced by drivers. Several inexpensive jumper cables now incorporate aluminum in an effort to reduce production costs and increase profits for the producer.
Unfortunately, this is yet another instance when the consumer ends up paying the price. Aluminum jumper cables are unlikely to produce the results you want, from bad current to melted cables.
Stick with cables that are made of copper for the finest outcomes. A thicker gauge of copper has better electrical conductivity than thinner gauges. Having said that, aluminum and copper mixed together also perform nicely. It’s also a good way to lower costs for the producer and the consumer.
These types of jumper cables use copper-clad aluminum wires, which have conductivities that are extremely similar to copper but are lighter and less expensive. These cables are a good investment for those on a tight budget and offer passable performance.
#3. Poor Jumper Cables.
This could be another reason why your jumper cables melted. If the right parts are used and the right procedures are followed, jump-starting a vehicle by connecting its battery to a good, functioning battery is a fairly simple process.
Yet, utilizing inferior jumper cables will probably result in problems. It pays to invest in high-quality equipment since it prevents problems like melted cables and not being able to get the electrical current needed to finish the task.
Any good mechanic business would most likely utilize 0-gauge jumper wires, so check before you go. This is the gold standard and provides the highest performance, but it costs a lot—up to $300 sometimes.
You’re better off with a gauge grade of 4-6 because that high of a gauge rating is not advised for everyday drivers. Nevertheless, the issue arises if you purchase jumper cables that are of poor quality in an effort to save a few dollars.
Even though they appear brand-new and attractive in their box, they don’t work well.
Generally, you can get away with using 6-gauge, but anything heavier than that increases your risk of failure. In addition to the jumper wires possibly melting, your car’s battery won’t be able to get the charge it needs to jump your car.
Spend a little more money and buy a top-notch 4-gauge pair of cables, whether you need them for yourself or as a gift for someone who needs a roadside emergency kit.
#4. Loose Connection.
Even if the jumper wires are correctly connected to the batteries, a loose connection can still cause the batteries to heat up very quickly. Electrical current is trying to move from one battery to another in significant quantities.
Hence, anytime a connection isn’t secure and complete, that voltage causes the wires to heat up to an extreme degree, melting the line.
Most of the time, human error is to blame for loose jumper cables. But it can also be brought on by corrosion, grime, etc., on the battery terminals or jumper wires. Always make sure that the lines have excellent contact with the battery terminals.
Make sure the clamps can attach firmly in place by looking at them.
#5. Defective Cables.
Another possible reason why your jumper cables melted is the result of defective cables. Jumper cables perform better when they are stored properly, which is crucial. When not in use, you must take the time to securely store your cables in a way that ensures their continued proper operation.
If your cables are kept in an area where they could be damaged by high temperatures, their performance could suffer. For instance, excessive heat will eventually cause the cables to fracture and crack.
The copper’s surrounding insulation must always be maintained in top shape. The copper may suffer damage if the insulation is compromised.
When this occurs, connecting the wires to a battery may cause hazardous electrical currents to flow through them, melting the line. Also, you should take every precaution to prevent moisture from getting near the cables.
Your jumper wires’ ability to conduct electricity can be affected by water, which will effectively limit their efficiency. As a result, you want to think about purchasing jumper cables that include a storage bag or just get a sturdy container to keep them in when not in use.
How can you properly connect jumper cables?
Here’s how to properly connect jumper cables:
- First, attach one end of the positive (red) jumper cable to the positive (+) terminal of the dead battery.
- Then, attach the other end of the positive (red) jumper cable to the live battery’s positive (+) terminal.
- Next, attach the negative (black) jumper cable’s one end to the negative (-) terminal of the live battery.
- Then attach the other end of the black jumper cable to a metal part (unpainted) on the car with the dead battery.
What to look for in jumper cables?
Here are things to look for in jumper cables:
Rating
You might wonder what a jumper cable’s “rating” is. Obviously, that depends on the size of the wiring that was utilized to build the line. Under the outer insulation, which protects your cable from the elements, is the wire.
The cable is thicker the lower the rating. You should only use heavy-duty jumper wires since the current flow should be strong enough to jumpstart the vehicle. Hence, 1- or 2-gauge lines produce the best results, whereas 9- and 10-gauge cables are only useful for compact autos.
Unfortunately, bigger cables can cost a lot more money. Thus, those in the 4- to the 6-gauge range should be chosen by general users. They keep you on a budget while still being durable enough for emergencies.
Material
You won’t be able to give your battery the boost it needs to charge if there isn’t a solid connection for the current to pass through. Hence, using inferior metal, like aluminum, will make it difficult to efficiently jump-start the car.
Aluminum wires put your jumper cable at risk of melting and take significantly longer to work than copper ones do.
Solid copper is one of the most effective electrical conductors of all metals. It’s recommended to stay with copper wires when jumping a dead car battery. Copper-clad aluminum jumper cables are a good option for people on a small budget.
The conduction required for a successful jump-start is still provided by them, despite the fact that they are not as durable as copper ones.
Clamps
Your jumper cables’ clamp design might determine whether you receive a tight, secure connection or one that is loose. The best “bite” will be provided by clamps with prominent alligator teeth, enabling you to attach to the battery posts securely and successfully.
Better teeth also make it possible to clamp down in a variety of positions, which, depending on the accessibility and location of the battery posts, might be quite useful.
High-quality jumper cables typically come with appropriate clamps, as opposed to the less expensive manufacturers’ usage of subpar clamps.
If you already have a set of jumper cables but aren’t having good luck with them, spend some time carefully looking at their clamps. You might discover that they are the issue. If so, think about buying a new set with clamps similar to the ones described above.
Insulation
Cheaper jumper cables can have very thin insulation, which leaves the interior metal wiring vulnerable. Heavy-duty jumper wires will likely have strong and durable insulation.
The inside is protected from the heat produced during the jumpstart process by thicker insulation. This greatly increases the cables’ functionality and ensures their durability.
Thick insulation makes cables more difficult to bend. To assure optimum performance, spend more money on a set that will last a long time.
Length
It will be harder to successfully jump your car the shorter your jumper cables are. 10-foot jumper cables should work for you the majority of the time. But you never know what situation you’ll find yourself in until you actually need a jump.
A 10-foot cable might not be long enough to get a jump from another car if you are parked in a specific way when your battery dies. As a result, you might wish to spend more money on 25-foot jumper wires.
They will cost a little more, but you’ll feel more secure knowing that you can get a jump in almost any circumstance.
How do you prevent jumper cables from melting?
Connecting the cables properly is the best way to prevent your jumper cables from melting. We’ve already discussed how to properly connect your jumper cables. Here are some other things to do in order to prevent your jumper cables from melting:
Purchase Good Quality Cables
Jumper cables could look all the same – two lengthy lines, each having a clamp at either end. Yet, cheap jumper cables have a higher chance of melting than a set of higher-quality cables.
Investing in quality cables will save you much more money in the long run than a few extra dollars—a wise investment, in our opinion.
Store Your Jumper Cables Properly
Jumper cables need to be maintained in good condition when not in use, as was indicated in the preceding section. The best approach to keep them safe is to put them in a bag.
Most cables should have one when you buy them. To get rid of any dirt or rust that can build up on the leads, avoid getting the bag wet and clean it frequently.
Moreover, cables may rust internally, which is more difficult to spot. But, as long as you keep the cables from moisture, you shouldn’t experience any issues.
Double-Check The Connections
By lightly tapping the jumper cable with your hand, you can double-check the terminal connections to make sure they are secure. When connecting the batteries, tighten them if necessary.
How to prevent jumper cables from getting hot
A high-quality jumper cable with a low AWG can save you from damaging your car (or hurting yourself) when jumping a car. Additionally, take the time to check that your jumper cables are connected correctly and securely and that the metal clips are not touching.
If you need a jump but realize your cables are damaged or are too small, it is better to call for roadside assistance.