The air conditioner and taillights are just two examples of the many electrical systems in your car.
When something goes wrong, it can be challenging to pinpoint the issue with one of those parts, but when it comes to the electronics of a car, there’s a good probability the issue is connected to a relay.
Relays manage a number of electrical components in your car. They act as switches, allowing one circuit to control another despite amperage differences.
Knowing where the issue is when they break down is crucial for a secure repair that doesn’t harm the car. Fortunately, testing a relay is a job that even inexperienced mechanics can complete.
Ok, let’s dive in!
What is a relay?
A relay is an electrically operated switch. A set of functioning contact terminals and a set of input terminals for one or more control signals make up the device.
Any number of contacts, including make contacts, break contacts, and combinations of both, may be present on the switch.
What is the function of relays?
Relays are electronic parts that exchange high voltages or currents with a lower voltage or current.
They function as a switch that is controlled by an electrical signal. The relay opens or closes a circuit in response to signals, allowing or preventing current flow.
Where are relays used?
When multiple circuits need to be controlled by a single signal or when a circuit has to be controlled by a separate low-power signal, relays are used.
Initially, relays served as signal repeaters in long-distance telegraph lines, reviving the signal coming in from one circuit by relaying it on another. Early computers and telephone exchanges both made heavy use of relays to carry out logical processes.
The usage of relays is common in cars, as well as in maritime and aviation applications. They are typically employed to enable the control of larger amperage circuits by low amperage circuits. Relays serve as switches that enable the low amperage circuit to turn on or off the high amperage circuit.
As an illustration, consider the headlights of your car. The amperage could surpass the switch’s capacity if you attached the lights directly to it, which could lead to cables melting and possibly even a fire in some circumstances.
Relays can also manage many systems simultaneously, such as turning on the headlights in conjunction with the radio or extending the antenna in conjunction with the windshield wipers.
What are some safety tips when working with relays?
Although relay testing is an easy process, safety should always come first. When working with relays, it’s a good idea to consider the following:
- Never begin working with relays or anything electrical in an area that has fuels or other flammable or explosive gases present.
- Mixing and matching relays from various parts of the car or a random garbage bin in your garage is not acceptable if you’ve decided that the relay is broken and has to be replaced. A power surge or short due to the incorrect relay can harm the electrical wiring of your car.
- Even if you’re an experienced garage tinker, use the service manual—not the owner’s manual—to identify and comprehend the wiring system and relays in your car.
- Avoid dropping the relay by handling it carefully. If the relay has an internal problem, the wiring may burn or melt. Do not alter the relay in any way, either.
How do you test a relay?
There is no need for a whole kit to check the relays in your car because it is a straightforward procedure. You’ll need these items to check for defective relays: a high-impedance test light, jumper wires.
Ohmmeter (commonly known as a digital multimeter or DMM), a replacement relay, and a vehicle service manual (not really necessary but highly recommended).
Here are steps to guide you on how to test a relay:
Find the relay that needs testing. Depending on what it controls, it can be under the dash or in the engine compartment. Check the electrical chapter and wiring diagram in your service manual if you’re unclear about the location.
Replace the relay with a known-good replacement to test it quickly and easily. The drawback is that the second relay can catch fire due to the identical issue that destroyed the first one. Moreover, it reaches into your wallet. While the relay is disconnected, check and clean the connectors.
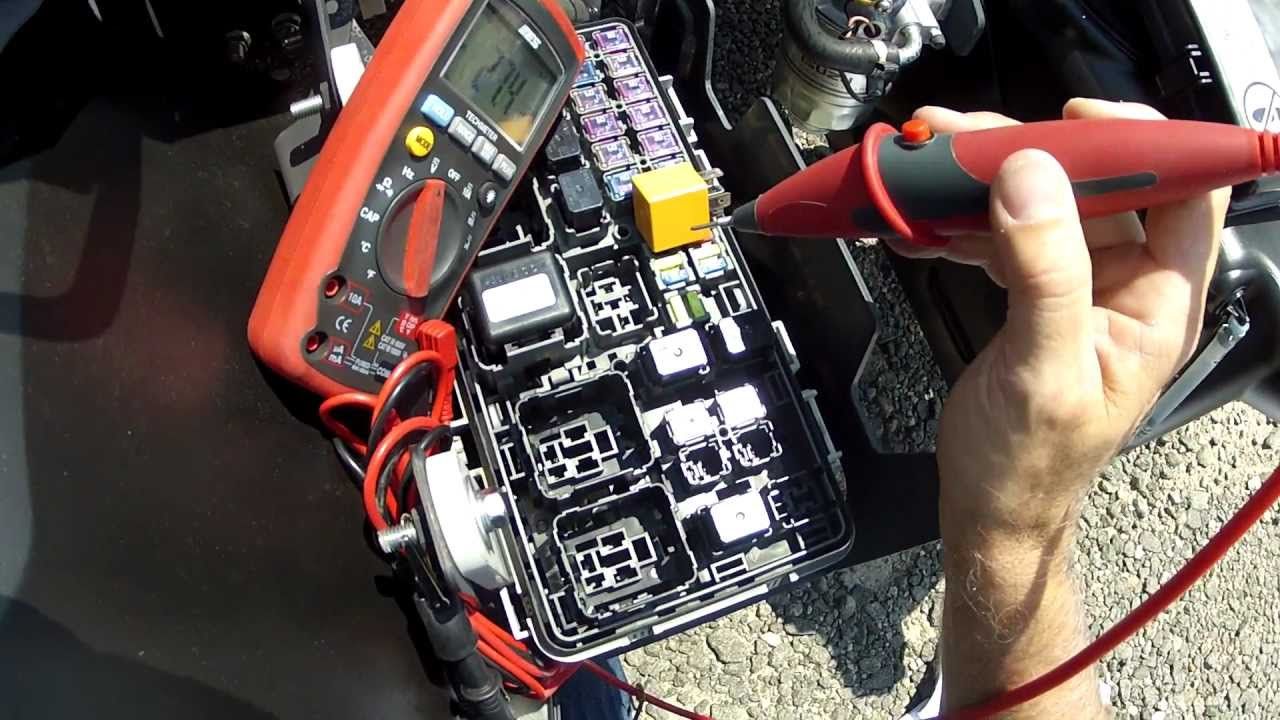
Set an Ohms multimeter to Ohms. Measure resistance by touching the leads across the electromagnet coil pins. Between 50 and 120 ohms is OK. It’s time for a replacement relay if the relay is out of range or is open due to a faulty electromagnet coil winding.
Keep the multimeter set to continuity or ohms. Cross the switch pins with the leads. Relays that are normally open should display open or OL.
Across the pins, connect a 9–12 V battery to power the electromagnet coil. As the electromagnet coil energizes and shuts the switch, there should be an audible “click” from the relay. On this 4-pin relay, polarity is unimportant, but on diode relays, it is crucial.
Jump the battery positive to one switch terminal while the coil is still active. Connect a test light between the ground and the other switch terminal. The current should flow to the test light, causing it to shine. Remove the battery-positive jumper. The test light ought to turn on.
Check the voltage of the relay at the switch. A voltage drop may result from poor contact points. Remove the test light, turn the multimeter to DC volts, and then touch the leads across the test light connectors or switch pins as indicated. The voltage of the battery should match the reading.
To ensure proper resistance, test the switch. The positive jumper wire should be disconnected. Energize the electromagnet coil.
Measure the resistance between the switch pins using the multimeter set to ohms. A usually closed relay should measure open, or OL, while an energized normally open relay should measure close to zero ohms.